Showing posts with label graphic design. Show all posts

Friday, September 6, 2024

The Ultimate Guide to Event Signage: Making Your Event Unforgettable

Event signage? I’ve done it all—from welcome signs and registration signs to meeting room signs, lawn signs, and event programs.

Event signage is more than just directional arrows and company logos—it’s a powerful tool for communication, branding, and creating memorable experiences. Whether you’re hosting a corporate event, conference, or trade show, the right signage can make a significant impact. Here’s everything you need to know about event signage and how to use it effectively.

1. Why Event Signage Matters

Event signage serves multiple purposes, from guiding attendees to reinforcing your brand’s presence. It’s often the first thing guests see when they arrive and the last impression they take with them when they leave. Effective signage not only enhances the guest experience but also ensures your event runs smoothly.

  • Brand Visibility: Signage is a key element in reinforcing your brand throughout the event space. Well-placed and well-designed signs keep your brand top of mind and create a cohesive visual experience.

  • Wayfinding: Clear, intuitive signage helps attendees navigate the event easily. This reduces confusion and ensures guests have a positive experience from start to finish.

  • Engagement: Creative and interactive signage can engage attendees, encouraging them to take photos, share on social media, or explore different areas of the event.

2. Top Event Signage Options

Choosing the right signage for your event depends on the venue, audience, and goals. Here are the top event signage options that have proven effective over the years:

  • Event Graphics: These large-scale designs can cover walls, floors, and even ceilings, transforming any space into a branded environment. Event graphics set the tone and create an immersive experience for attendees.

  • Pop-Up Banners: Versatile and portable, pop-up banners are a popular choice for events. They’re easy to set up and can be used for branding, displaying schedules, or highlighting key messages. Their compact size makes them ideal for registration areas, exhibitor booths, and stage backdrops.

  • Hanging Banners: Suspended from ceilings or structures, hanging banners are perfect for large venues. They’re highly visible and can guide attendees to different sections or showcase major sponsors. The elevated placement ensures they’re seen from a distance, making them ideal for branding or directional purposes.

  • Meter Boards: These freestanding signs are commonly used for directional signage, agendas, or announcements. They’re sturdy, easy to reposition, and can be customized to fit the event’s theme. Meter boards are great for providing information in high-traffic areas like entrances, hallways, and lobbies.

  • Decals: Floor and wall decals are a creative way to grab attention and lead attendees through the event space. They can be used for wayfinding, branding, or even as interactive elements. Decals are especially useful in venues with strict regulations on traditional signage, as they can be applied and removed without damage.

3. Design Tips for Effective Signage

Creating signage that captures attention and communicates effectively requires thoughtful design. Here are some tips to ensure your event signage stands out:

  • Consistency: Maintain a consistent look across all signage, including colors, fonts, and branding elements. This creates a cohesive experience and reinforces your brand identity.

  • Readability: Ensure that text is easy to read from a distance. Use large fonts, high contrast between text and background, and simple language. Avoid clutter by focusing on key messages.

  • Placement: Strategically place signage where it will have the most impact. Consider high-traffic areas, sightlines, and the flow of attendees. Think about how signage interacts with the space and complements the overall event design.

  • Call to Action: For promotional or sponsor signage, include a clear call to action. Whether it’s encouraging social media shares, directing attendees to a booth, or promoting a product, make sure the message is direct and compelling.

4. Incorporating Technology

In today’s digital age, integrating technology with your signage can enhance engagement and provide real-time information. Consider the following options:

  • Digital Signage: Digital displays allow for dynamic content, such as rotating messages, videos, or live updates. They’re perfect for high-traffic areas where you want to keep information fresh and engaging.

  • Interactive Kiosks: Touchscreen kiosks can provide wayfinding assistance, event schedules, or interactive maps. They’re a great way to engage attendees and provide personalized experiences.

  • QR Codes: Adding QR codes to your signage allows attendees to quickly access more information, download event apps, or connect on social media. It’s a simple way to bridge the physical and digital aspects of your event.

Wednesday, August 14, 2024

Step and Repeat Banners: Making Your Event Unforgettable

I can quickly design a step and repeat banner for your event.

Step and repeat banners are a staple at high-profile events, offering both branding opportunities and a professional backdrop for photos. Here’s why step and repeat banners are essential for your next corporate event and how to make the most of them.

1. What is a Step and Repeat Banner?

A step and repeat banner is a large backdrop that features logos, branding, or event names repeated in a pattern. These banners are typically placed in high-traffic areas where attendees are likely to take photos, ensuring your branding is visible in every shot.

2. Branding Opportunities

Step and repeat banners are a prime opportunity to showcase your brand or event sponsors. The repeated pattern ensures that logos are always visible, regardless of where the photo is taken. This makes them ideal for press photos, social media, and event coverage.

  • Logo Placement: When designing your banner, place the logos in a staggered pattern to maximize visibility. Make sure the logos are large enough to be easily seen but not so large that they overwhelm the design.

  • Color Scheme: Choose a color scheme that aligns with your event’s theme or your brand’s colors. This creates a cohesive look that enhances the overall aesthetic of the event.

3. Creating an Impactful Design

A well-designed step and repeat banner can elevate the look and feel of your event. Here are some tips to ensure your design stands out:

  • Simplicity is Key: Keep the design clean and uncluttered. Too many elements can make the banner look busy and detract from its purpose.

  • High-Quality Graphics: Use high-resolution images and logos to ensure they look sharp and professional. Blurry or pixelated graphics can negatively impact your brand’s image.

  • Consider Lighting: The placement of your banner should take lighting into account. Ensure it’s well-lit to avoid shadows or glare in photos. You might also consider using a matte finish to minimize reflections.

4. Placement and Size

The placement and size of your step and repeat banner are crucial for maximizing its impact.

  • Location: Place the banner in a high-traffic area where attendees are likely to congregate, such as the entrance, near the stage, or by the bar. This ensures it’s seen and used by as many people as possible.

  • Size: The size of the banner should be proportional to the space. A larger banner is more impressive but make sure it doesn’t overwhelm the area or obstruct views.

5. Encouraging Engagement

Encourage attendees to take photos in front of the step and repeat banner. You can create a hashtag for the event and display it on the banner, prompting attendees to share their photos on social media. This not only increases engagement but also extends your event’s reach beyond the venue.

6. Versatility

Step and repeat banners aren’t just for red carpet events. They can be used at conferences, trade shows, product launches, and more. They’re a versatile branding tool that can be reused for multiple events with minimal updates.


Tuesday, August 13, 2024

Creating Swag for Events: Fun, Functional, and Memorable Giveaways

Swag I designed for Western Illinois University: beachball, fan, ice cream scoop, sunglasses, pen, and loads of stickers

Swag items have become a staple at corporate events, conferences, and trade shows, serving as tangible reminders of the experience and your brand. But how do you choose swag that stands out, serves a purpose, and resonates with your audience? Here’s a guide to creating fun, functional, and memorable swag that leaves a lasting impression.

1. Understand Your Audience

Before diving into the world of swag, it’s crucial to know who your audience is. Are they young professionals, seasoned executives, or families? Understanding their preferences and lifestyle will help you choose items they’ll actually use and appreciate.

2. Practicality Meets Creativity

Gone are the days of generic pens and notepads. Modern swag should be both practical and creative. Think about items that attendees can use during the event or take home as a keepsake.

  • Fans: Perfect for outdoor events or warm climates, branded fans offer a refreshing way to cool down. They can be designed in various shapes and sizes, adding a fun twist to a functional item. Imagine the fun of a sea of "Rocky" head fans waving at a football game!

  • Ice Cream Scoops: If your event has a summer or family-friendly theme, ice cream scoops are a playful and unique giveaway. They’re practical for use at home and will remind recipients of your brand every time they indulge in a sweet treat.

  • Beach Balls: These are excellent for events with a casual or beach theme. Beach balls are light, easy to transport, and can be customized with your brand’s colors and logo. They’re also great for encouraging interaction among attendees.

  • Sunglasses: A classic swag item that never goes out of style. Sunglasses are practical, widely appreciated, and offer ample space for branding on the arms. Choose trendy styles and colors that align with your event’s theme.

  • Stickers: Stickers are a versatile and cost-effective addition to any swag bag. They can feature your logo, event theme, or fun designs that resonate with your audience. Stickers are perfect for laptops, water bottles, and notebooks, ensuring your brand is visible wherever your attendees go. Offering a variety of designs allows attendees to choose their favorites, adding a personalized touch to your swag.

3. Quality Over Quantity

While it might be tempting to order large quantities of inexpensive swag, quality always wins. High-quality items are more likely to be used and cherished, creating a positive association with your brand. Make sure the materials and print quality reflect your brand’s commitment to excellence.

4. Align with Your Brand

Your swag should be a reflection of your brand’s identity. Choose items that align with your brand’s values, colors, and overall message. For instance, if your brand is environmentally conscious, opt for eco-friendly materials or reusable items.

5. Personalization

Personalized swag adds an extra touch of thoughtfulness. Consider adding individual names, event-specific messages, or unique designs that attendees will feel are created just for them.

6. Distribution Strategy

How you distribute your swag is just as important as the items themselves. Consider using swag bags at registration, creating a dedicated swag station, or using items as prizes for event activities.

Conclusion

Creating swag for events is an opportunity to reinforce your brand and enhance the attendee experience. By choosing items that are fun, functional, and memorable, you’ll ensure that your swag stands out and continues to promote your brand long after the event is over.

Sunday, December 6, 2020

How to Make Awesome 3D Printed Keychains


My latest hobby is 3D printing! I love it. I have a Elegoo printer. I think it stands for elegant goo, but I could be just making that up. LOL. The goo, in this case is resin, which I’ve been collecting in a number of popular colors to do my printing in. One can download ready-made files to print, for instance if you wanted a stand for your mini mixer, or a case for your Raspberry Pi. But if you want to do custom, branded work, it’s best to make it yourself. Here are 10 easy steps to create your own branded keychain. Of course, if you don’t have a 3D printer, or know the software, you can hire someone to do it for you, like me.

  1. Take your client’s logo, convert the logo into a vector graphic & save as SVG file 
  2. Open up Blender, a free 3D graphic software and import your SVG logo
  3. Adjust to keychain size
  4. Extrude the logo to desired depth
  5. Add a backing
  6. Add key ring hole
  7. Download design as STL file
  8. Open Chitubox, a free slicer software, and import the STL file
  9. Prep the image according to your CD printer’s requirements and save as CTB file
  10. Print with your 3D printer


Friday, December 4, 2020

Video Adds Value to Virtual Meetings


Every animation starts with a storyboard, and every story needs a hero. Our hero is the 2021 Midwest Energy Solutions Conference logo.

I like to start with a hint, and then the big reveal, followed by a conclusion.

4 second storyboard

I created this short animated logo in Adobe After Effects. I took the logo into Adobe Illustrator, and changed the color profile to RGB, and copied the 2021 to a new file. I gathered my assets in AE, and animated it. The number graphic "2021" starts out at 0 seconds at 1500% and rotated 90 degrees. Below it is a white rectangle shape with feathered edges, that I use effectively as a mask. And on a layer below that is our hero of the story, the logo, who will be revealed as the 2021 and mask graphics rotate and scale into place. Fade to white. Fin.

Then I output as mp3.


Here's a 10 second video. I found a public domain clip of the bean, desaturated it to grey scale, and let the logo slide up and fade in. Then surprise, text appears with the date & time of the upcoming video conference.

Tuesday, December 1, 2020

Virtual world for a virtual conference

 I created some assets in Blender, a 3D program.

These are the awards in real life (irl)


I made a virtual logo. Why did I put my name on the award, for the LOLs!


I used the conference letters as reference for modeling the logo in 3D. 


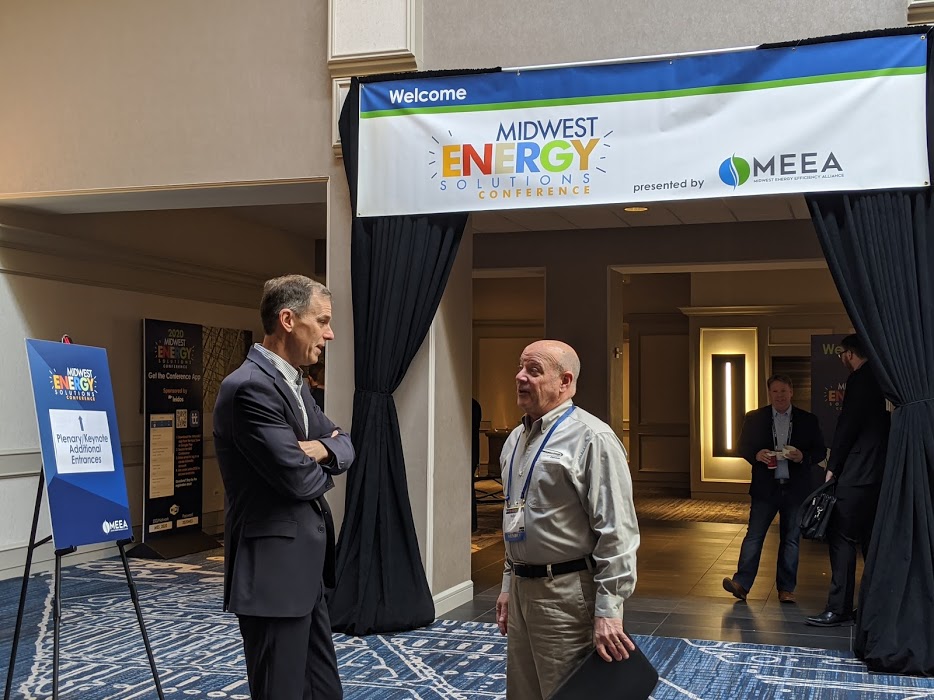
The welcome banner 


And I made a virtual welcome banner set in a virtual conference hall, again based on the banner used last year. 

Monday, November 23, 2020

Designing for Virtual Meetings

Since the 2020 Pandemic began, my design work for meetings has virtually disappeared. I used to do banners, signage, menus, apps, badges, podiums, wall clings, programs, etc. for events from coast to coast. And then I would travel out to the events and work them as a tech expert. What fun staying at luxury hotels, meeting tons of people, eating gourmet food, and working really long hard hours. Lord! I miss it!

But I'm nothing if not adaptable. I've been doing graphic design for virtual meetings. Because having graphics helps relieve the monotony of Zoom talking heads, and gives people a break from feeling like they have to look alert for hours because they're on camera. 

I made over 100 PowerPoint slides for one meeting. There were slides several opening slides and slides for each panel, with the name & photo of all the members of the panel. Then a version of that slide, with "Up Next." Then individual slides for each speaker, in case their video goes out. And an overall "Please stand by" for technical difficulties. 


I've learned how to do 3D design (mainly to build my robot minions) for printing and animation. More about that in my next blog!